Short answer:
Connect Xink to Entra ID (Azure AD) to automatically sync users into the Employees menu. The integration keeps user data up to date and removes users who no longer exist in Entra ID.
This integration allows you to automatically manage employee data such as name, title, and contact details without manual updates.
How the integration works
- Xink connects to Entra ID using the Microsoft Graph API
- The integration is read-only (no data is written back)
- No access to passwords or infrastructure
- You control which users and fields are imported
- Only selected employee data (e.g., name, title, phone) is stored in Xink
Use filters to exclude service accounts, shared mailboxes, and meeting rooms to ensure accurate licensing and cleaner data.
Default fields imported from Entra ID
The following default fields are imported when the integration is enabled. You can customize them in Preferences > Fields:
- Add or remove fields
- Change field order (affects the Employees view)
- Modify field mappings to match your Entra ID schema

Step-by-step: Enable Entra ID user synchronization
- Go to Preferences > Integration > Entra ID
- Click the Link Entra ID Account

- Sign in using Microsoft 365 admin credentials. We recommend using a dedicated Entra ID administrator account for granting consent to the Xink Entra ID Reader application. This provides continuity if an individual administrator leaves the organization. Minimum role required: Application Administrator (only during setup).

- Approve permissions. Tick Consent on behalf of your organization and click Accept

Configure synchronization settings
After connecting, the Tenant Name will populate automatically.
- Keep default email mappings:
- ProxyAddresses array
- Other (Alternative) email array
- Leave Try to use User Principal Name as Email unchecked unless needed
Add filters to control which users are imported: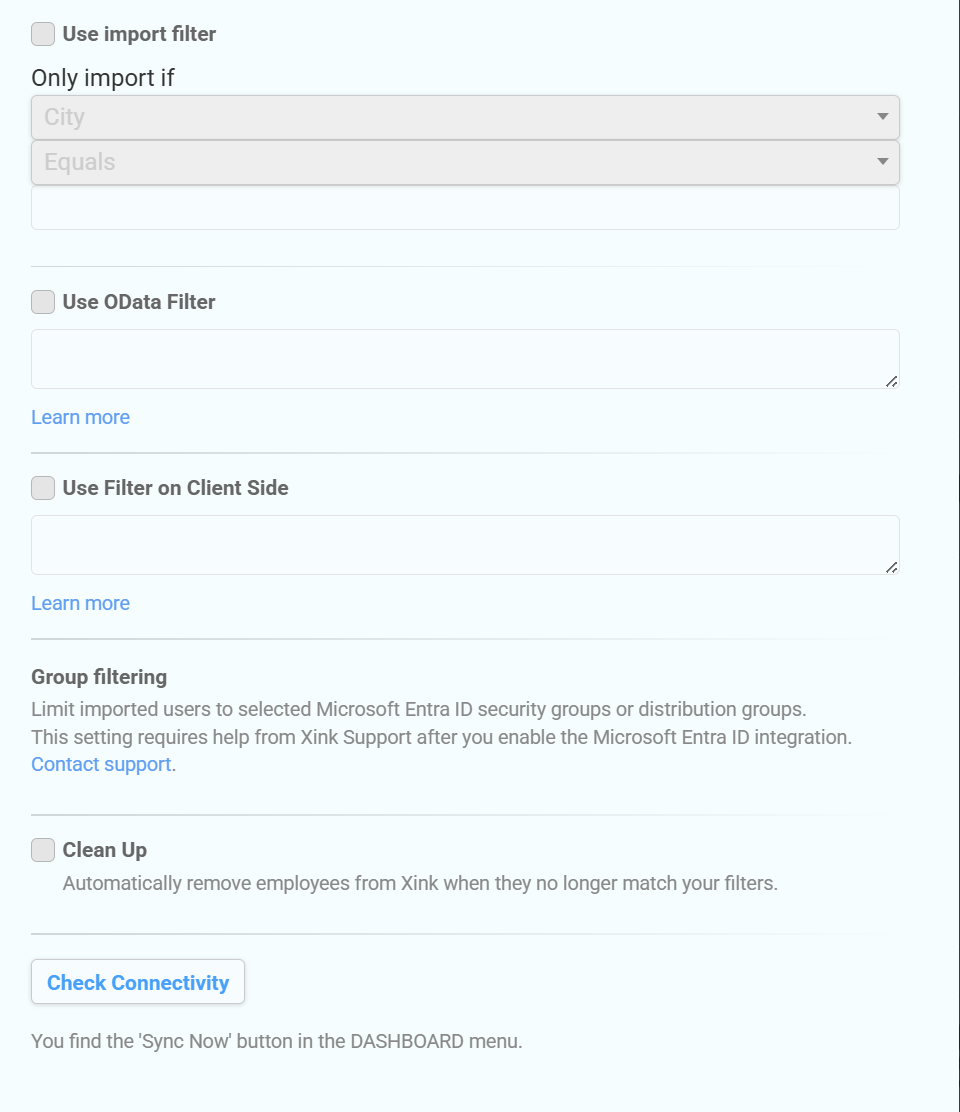
- Click Check Connectivity to validate the connection
- Enable Clean Up to remove users not matching your filters

Click Save to activate the integration.
How synchronization works
- Users are automatically synced every 2–4 hours
- You can trigger a manual sync via Dashboard > Sync Now
- User data such as name, title, and phone is updated automatically
- New users are added and removed users are deleted (if Clean Up is enabled)

Security and authentication FAQ
Why do we recommend a dedicated administrator account?
We recommend using a dedicated Entra ID administrator account to grant consent to the Xink Entra ID Reader application. This provides continuity if an individual administrator leaves the organization.
The Xink Entra ID integration uses Microsoft Graph APIs and Microsoft's modern authentication framework (OAuth 2.0 and OpenID Connect). Xink does not store a username and password and does not perform synchronization through a traditional service account login during each sync.
Does the account need to bypass MFA or passwordless policies?
No. The consent process follows your organization's existing Microsoft authentication policies, including Multi-Factor Authentication (MFA), passwordless authentication, Conditional Access policies, and other security controls.
Why does the application request "Sign users in" permission?
This permission is part of Microsoft's OpenID Connect authentication process and allows Microsoft to identify the administrator granting consent to the application.
It does not allow Xink to sign in end users, access user passwords, or bypass your organization's authentication policies.
Does Xink have write access to Entra ID?
No. The integration is read-only. Xink reads selected user attributes from Microsoft Graph and does not create, modify, or delete users, groups, or other Entra ID objects.
Troubleshooting tips
- No users imported? Check your filters and connectivity
- Missing email addresses? Ensure users have a valid primary SMTP address
- Sync not updating? Trigger a manual sync from the dashboard
